Sunday, 27 December 2015

Battery Master Switch Install

Having forgotten to trickle charge my car a few times and found the battery completely flat I decided to install a battery master switch.  It also gives a good excuse to tinker with the car.  The complete list of winter jobs included :
  1. Redo the back brakes following the blatchat method to see if that loosens the rear wheels.
  2. Change the oil (Fuchs Titan Race Pro S 5w30).  5520 miles on the speedo.
  3. Put a 3 pin euro plug onto my spare speedo sensor and add to my bag of spares in the car.
  4. Install the BMS.
Items 1 to 3 caused no headaches but item 4 had me confused for a while with the wiring.  I used the lotus 7 club 'how to guide' regarding installing a BMS but some of it just didn't stack up for my car.  Therefore for those who wiring is similar to mine I have included some instructions below.


Does your existing wiring match the statements below :
  • You have connected a large red cable from the battery +'ve to the right hand pin on the solenoid.
  • Connected to the same pin are two brown cables.
  • You have an old style ignition switch (metro I think).
  • You have no white cables going to your ignition switch.
  • You want to install the BMS in the scuttle near to the fusebox.
  • You have a BMS which has 2 large connectors and 4 spade type connectors identified as 1 & 2.
If you have this wiring then it matches what I have and the below may be of some use.


Step 1 
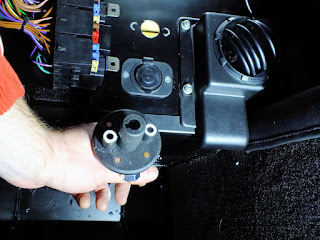
Drill a 20mm hole in the vertical black panel between the engine bay and passenger area.  Open up the hole slighty with a dremmel.  Apply some chalk to the fixing hole face and push the BMS up against the vertical black panel to identify where the fixing holes need drilling.  Fix the BMS using the 2 hex set screws, washers and nylock nuts.

Hole drilled in vertical panel above the passengers knees and next to the fuse box.  The fixing holes have been covered in chalk and pushed up against the panel to make where to drill.


Step 2
Disconnect the large red cable from the battery and connect it to the bottom connection of the BMS.  In addition to connecting the large red cable to the bottom connection of the BMS, also make up a 3 inch green cable (round lug on one side and spade type connector on the other) and connect it to the bottom connection of the BMS and one of the pins labelled No. 1.

Step 3
Make another 3 inch long green cable (a spade type connector on one end and a through connector on the other), connect the spade to the other No. 1 pin on the BMS and the through connector to one side of the large white resister.  Use some heatshrink sleeving to keep everything isolated and looking tidy.  Make a 12 inch long green cable (a through connector on one end and a lug on the other).  Connect the through connector to the other side of the large white resistor.  Connect the lug to an earthing point on the car.  There is a spare threaded link in the chassis by the ECU on my car.

Step 4
Mount the white resistor inside the metal bracket which comes with the CC kit.  Then use one of the fixings of the BMS to fix the bracket close to the BMS.  You may need to open up the bracket with pliers and fold it around the white resistor.

N.B.  There are four pins, 2 labelled No. 1 and 2 labelled No. 2.  The number 1 pins are normally closed when the BMS key is off or has been removed  This means that the resister connected will take any energy from the solenoid to earth when you switch the BMS off and remove the key.

Step 5
Take the back off the ignition and identify the pin which has two cables into one spade connector.  The original instructions says these are white cables but I found they were black on my wiring loom.  They were also connected to connector number 30 on the ignition.  See below.

The cables I needed to disconnect from the back of the ignition were the two black ones on the lower right, connection number 30.  Keep the black cables together in the white plastic connector.

Step 6
Make two lengths of cable which can reach from the ignition to the BMS pins labelled no. 2.  The first cable is connected to the two cables which are in the white plastic connector and to one of the pins labelled no. 2 on the BMS.  The second cable connects to the ignition where the two black cables used to be (connection number 30), the other end connects to the other pin labelled no. 2 on the BMS.

N.B.  There are four pins on the BMS, 2 labelled No. 1 and 2 labelled No. 2.  The number 2 pins are normally closed when the BMS key is in and switched on.  This means that the power gets to the ignition switch  when the BMS is on.

I imagine the above is a little confusing due to the connection names I have adopted and so hopefully the photograph below helps.


Cable A : Large Red Cable : From top BMS connector to battery +'ve.
Cable B : Large Red Cable : From Solenoid to bottom BMS connector.
Cable C : Small Green Cable : From bottom BMS connector to No. 1 pin on BMS.
Cable D : Small Green Cable : From No. 1 pin on BMS to one side of white resistor.
Cable E : Small Green Cable : From other side of white resistor to car earthing point.
Cable F : Small Black Cable : From two black cables disconected from the ignition to one of the No. 2 pins on BMS.
Cable G : Small White Cable : From other No. 2 pin on BMS to ignition connection No. 30.


The finished switch installed with the key in the off position.   


Friday, 4 September 2015

France

Had a great two week blat in France.  The roads as others have said are so enjoyable to drive on.  We will definitely be going back despite all the messing about with the chunnel and finding the right Gite.

On the way to France.  The picture coming home looks about the same so I haven't bothered with it.  The tunnel journey gave me time to take the hood off, pack a few things away and set up the sat-nav. 

Quiet roads all the way from Calais.  The journey back from Quimper was 452 miles. 
 
A slight mishap on the way there was me running out of petrol.  I think the increased speed with 188 miles on the clock saw the engine cut out.

France won the who has the best bridges competition.

A couple of very wet days but the hood and SBFS cover kept the cab perfectly dry.

Happier times in the dry.  My job was the morning croissant run which I did using the Caterham.

Sunday, 2 August 2015

New Tyres

UPDATE
After 2000 miles or so having driven in temperatures of 34 degrees and in monsoon conditions I am giving these tyres a massive thumbs up.  The softness of the rubber is noticeable straight away and you feel much more grip when you start to lean on them.  However to also have two massive channels for standing water proved it's worth when I found myself driving through standing water in France for about 2 hours.  I will be buying these again

----------------

I was told long before I took delivery of my Caterham Roadsport that the tyres that came with it (AVON ZV3) were rubbish for the cars.  Apparently they are fine in hot dry conditions but not for cold damp or wet conditions.  Needless to say the warnings were true.  No matter how much you spun them up the tread was as deep as the day I got them.

So I started looking for alternatives which led to a limited selection given I have 14 inch minilites.  In the end I opted for Uniroyal Rain Expert 3's.  Two reasons really, (1) They are listed as being inefficient which I read as being sticky and (2) being rain tyres I am expecting the rubber to be softer at lower temperatures.

I ordered them through Blackcirlces and had them fitted at Bury Road Garage (who I can't recomend highly enough, the balancing and care taken is perfect, ask for Ben).  The tyres were ~£44 each.

I used them for the first time to go to the Harewood Hill Climb and whilst it was dry and warm and I can say I have already noticed that they are a lot lot better than the ZV3's.  I will report back again when it rains and again in the winter.

Uniroyal Rain Expert 3 - 185 / 60 / R14

Harewood Hill 2015

Thanks to LADS for organising another great outing to a fantastic event.  So many amazing cars being put through their paces as they spend 58 to 70 seconds going from the bottom to the top of the hill.


Thursday, 23 July 2015

Taith Eryri Tour 2015

Thanks to the Caernarfonshire and Anglessey Motor Club for organising the fantastic 73 mile round trip.  Great to see them raise £1400+ for the Wales Air Ambulance.

A bit of a tight corner which needed more lock and more right foot.

Hardly hogging the apex.


Paul in the TR7 admiring the car in front.

Saturday, 16 May 2015

Blatting - Rammy : Rivington : Ribblehead

I try and get out early (6am) most weekends to avoid interrupting the kids social calender's with their football and rugby commitments.  I have found some great photo shoot ops alas the sun has tended to disappear as I arrive at the most photogenic areas.  The car is going great, I am getting used to the tyres (warm / cold / dry / wet).  They are ok, I am sure other tyres are better than the ZV3's but with 14" rims there is very little choice.  Anyway, some pictures.

Moor road near Rivington, Lancs

Moor road near Rivington, Lancs

Moor road near Rivington, Lancs

Low Sleights Road, Ribblehead

Low Sleights Road, Ribblehead

Slightly modified Landy on-route

Saturday, 2 May 2015

An Oil Leak !!!

***UPDATE***
Caterham Cars helped me source a replacement orange pipe, o ring and connection (see below).

This is the part I replaced.

I took off the old one and put in the new one (took a bit of faffing due to the lack of space, thank goodness I have an SV).  With the new item fitted and everything back in place I have not had any oil come from that area since and I have covered ~ 2,500 miles.

I did find this website online which shows the part numbers and Ford can get these parts for you.  Here
**************

I was under the car today and thought there is a bit of oil on the bellhousing to engine and bellhousing to gearbox joints.  Upon closer inspection I found there is a black plastic housing on the side of the engine (under the plastic plenum) and there appears to be oil seaping from it.

Looking at the plastic housing it says HA VALVE on the side of it.  There is a short pipe going from the underside of the plastic plenum to the HA Valve via an orange right angle tube.  The orange right angle tube can rotate in the Ha Valve.

I am not sure what teh HA Valve does, if it is even a HA Valve and whether it should have any oil anywhere near it.  Hopefully blatchat will work it's usual magic and someone will have had the same problem.

This is the pipe I removed which goes from the plastic plenum to the Ha Valve.

This is looking down at the orange right angle pipe which can rotate.  It sits in the top of the Ha Valve.

This is the view of the Ha Valve from underneath and you can see the oil splatter.  There is also a drop of oil about to spill onto the engine case which would then run down to the bellhousing area.

The bit in the green circle is where the leak is coming from.


Any help greatly appreciate.

Monday, 27 April 2015

All for a piece of Green.

I find it quite sad that Caterham are no longer part of the F1 world.  All the staff who worked so hard building the cars and getting the team organised.  It was even more sad today when I went to the factory to collect the auction item I had won.  (The rear left cover 'with M').  I wasn't sure whether to bid or not but then again the team had already been laid off and money raised should be going to those owed money.

Having won the auction item the next thing was getting it.  The Post and Pack option quoted £105 for an item which cost just £90.  But, from Lancashire to Leafield (via the scenic route) is ~168 miles each way.

I checked the weather, shifted a few work meetings around and today (Monday 27th April) I drove to pick up my peice of green.

An early and cold start at 5.45am.  The heater was on full,  I had a thick jacket and 2 layers and I was still bitterly cold almost all of the way there.

I plugged a diversion into the satnav to get me close to Jodrel Bank.  I have passed it many times on the train to London but never visited.  Needless to say it was closed at 7.30am in the morning.

Another Pic

And another pic. 

This was the road from Leafield back to Chipping Norton.  Didn't think too much of chipping Norten but great roads.

And the piece of green.  £60 in petrol and a great day off work driving the seven.

Sunday, 26 April 2015

Tool Tube Installation

Many thanks to Jonathan Kay for organising a tool tube bulk buy.  Two tubes and two red bags for ~£16 is truly a bargain.  After the usual sunday events such as kids rugby and cutting grass, I managed to find an hour to install the two tubes.

I have the sumo version of a caterham and as such there is a little more room for the tool tubes than I guess some other owners may have.  The first one was installed at the end of the drivers footwell, this was put in at a slight angle to allow the top to unscrew easily.  The second one went under the crossbracing above the steering column.  The second one couldn't go above the crossbracing as that is where I strap the jack and wheel brace.

The first tube installed.

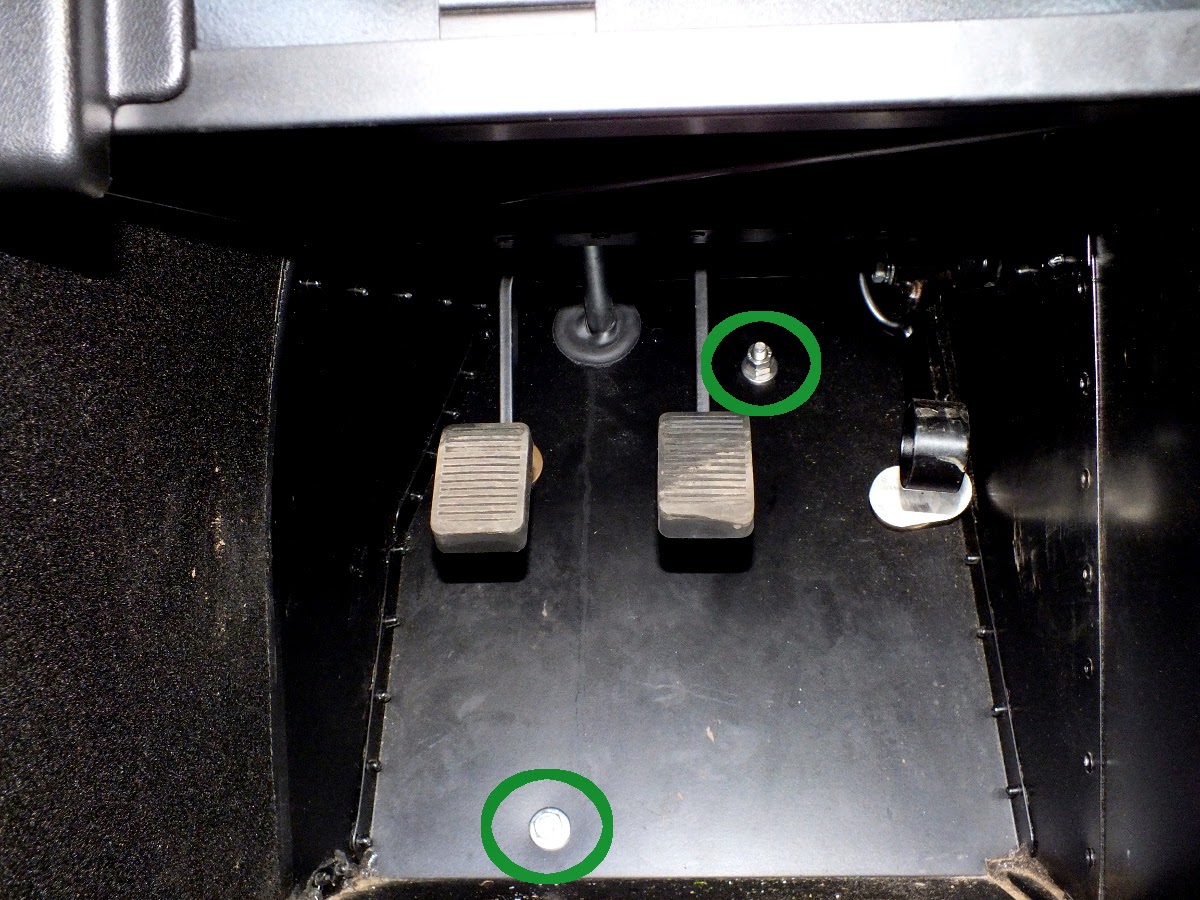
The M8 bolts inside the drivers footwell.

Three 19mm P Clips with 25mm M6 Bolts fix the tube to the underside of the crossbracing.

I also put a tie wrap around the tube and the diagonal to stop the tube rocking side to side and banging on the diagonal.

Two P Clips for the top end of the tool tube.

This shows the jack on top of the crossbracing.

I may change this set up and add a piece of metal to the tool tube to stop the plastic from bending.

Sunday, 19 April 2015

Rammy to Fleetwood

I am coming up to a year of on the road ownership and with just over 3000 miles on the clock I can safely say I am getting out and about as much as possible.  I decided on a drive through the forest of bowland and up to Fleetwood on Saturday.  The sun was out but it was a little chilly when going at speed.  None the less the drive there and back was great.  Had a slight issue with the fuel guage appearing empty at ~180 miles yet I could only get 26 litres into a 42 litre tank when I went to fill up.