Wednesday 23 April 2014

Day 29 - IVA Test

I arose bright and early to sort out the car and tools and get some petrol and by 7am I was running along the top road above Rammy bedding in the brakes. I hit the motorway by 7.10 and got to Chadderton VoSA by 7.25am. When I arrived I was no more confident the brakes were up to much or that the speedo did a lot. 

There was a tapping coming from the rear left and a quick look under the back showed the p clips holding the handbrake cable had rotated through 180 degrees and the handbrake cable was now catching the drive shaft. I turned the p clips around and prayed they stayed there.

 The test itself was a real eye opener with regards what they look for and how they go about it. I learnt a lot and I am very grateful to the guys for their time to explain things. I had already followed all the advice online on various blogs, LADS, Caterham Midlands etc. But there were still some items that came up for discussion. However no showstoppers and after 4 hours the car had passed.

 For others taking their own car then definetly drive it there, it's good fun, sounds amazing, heats the cat and does do a little for the brakes. I took some tools and trim material but wish I had taken more. The IVA guy wanted to look inside the pedal box so I needed my 1/4 socket set to get to the bolt tucked down low on the engine side. I wish I had more cycle wing trim for the bonnet air vents (see pic). I did take some build pictures and they did ask for them. Make sure you take a spanner or adjustable for the headlights. They let me set them up on the machine whilst there which was very helpful.

 Most interesting was which elements needed a 2.5mm radius. The poppers are 4.8mm high and so do not need a 2.5mm radius. However the bonnet vents are 5.8mm high and so the 3 edges nearest the windscreen do need rubber trim. (see pic). The brakes were tested twice, probably to be sure they were warm and working properly.

 The fog light was not an issue as wired as standard on the Caterham loom. No need for the CBS relay solution.

A fresh morning as I set off to the VoSA test centre.

Parked up and waiting for 8am.

28 miles covered today.  Couldn't stop on the M60 to photograph the magic 7 mile mark.

Rubber trim keeping pedestrians everywhere safe.

The finished car.


Monday 14 April 2014

Day 28 - Post Build Check

Paul and Peter from LADS (Lancashire and District Sevens) arrived very early this morning to Chauffeur me and my car to Caterham Midlands today for the Post Build Check. As previously mentioned I needed the engine hunting looking at and a few other minor bits.

All in all the build, parts delivery and general sales and service has been 1st class and today was no different.
After the mechanic had finished going over the car he gave me a list of things that needed doing for the IVA (based on what they are aware of via the Nottingham Test Center). As has been discussed many times, each center interprets the regs slightly differently so I may find Chadderton ask for something different. But I have a good base to go at. The things I had not done included :

  1. Done - Fill the lower front shock hole in the lower wishbone.
  2. Done - Put washer pipe over the repeater cable for 2" either side of where it passes through the skin.
  3. UPDATE - I don't think I need the fog light mod if you read various kit car forums.  I'll find out on Wednesday I guess.  The IVA fog light mod is a relay to ensure the fog light goes off and stays off where the car is switched off.
  4. Done - Rubber pipe over the top ball joints.
  5. Done - File down the casting lug on the front brake calipers.
  6. Done - Remove doors and hinges.
  7. Done - Mount mirror in the top hole.
  8. Done - Label the dash if a switch has no symbol.
  9. Done - Set up headlights.

In addition to the IVA items they also picked up some school boy errors <Hang head in shame>.
  1. Done - Steering column clamp is upside down.  The chamfer should be up against the rod.  See picture.
  2. Done - Exhaust clamp too far back.  See picture.
  3. Done - Battery cover missing. 
  4. Done - Battery breather pipe needed.
  5. Done - Seat belt (red bit) mounted upside down, i.e. swap the passenger to driver and vice versa (see picture).
  6. Done - Air box seal the wrong way around.  
  7. Done - Remove IVA trim around the exhaust.
  8. Done - Snip the speedo wiring tie wrap off the handbrake cable.
All in all not too bad.  Very grateful to Caterham for the free PBC and the list of things to sort, tips and advice.  Also a huge thank you for sorting out the hunting and the tip for not starting the car with your foot on the throttle.

Any switches without symbols apparently need labels.  Some go for handwritten address type labels.  I went fractionally more upmarket and took some graphics from the web and printed those out.

More labels.

I fitted a new piece of 3m Film to the nose today.  Having wrecked the last piece with what appeared like dirt, it was quicker to fit this piece and it looked a whole lot better for it aswel.

One of the last jobs, the badge went on.  The badge suits the car well.   Not sure if it works with all colours.

My highly technical headlight set up arrangement.  The back wheels are on bricks to level the car up.  I am sure the lights will need adjusting at the IVA test.

+ marks the apex spots.

I didn't have any more boots from Caterham so I used some spare trim and some tie wraps.  Fingers crossed it's ok for the IVA.

Seat belt with the buckle facing down as it should be.

Mirror in the top windscreen bolt.

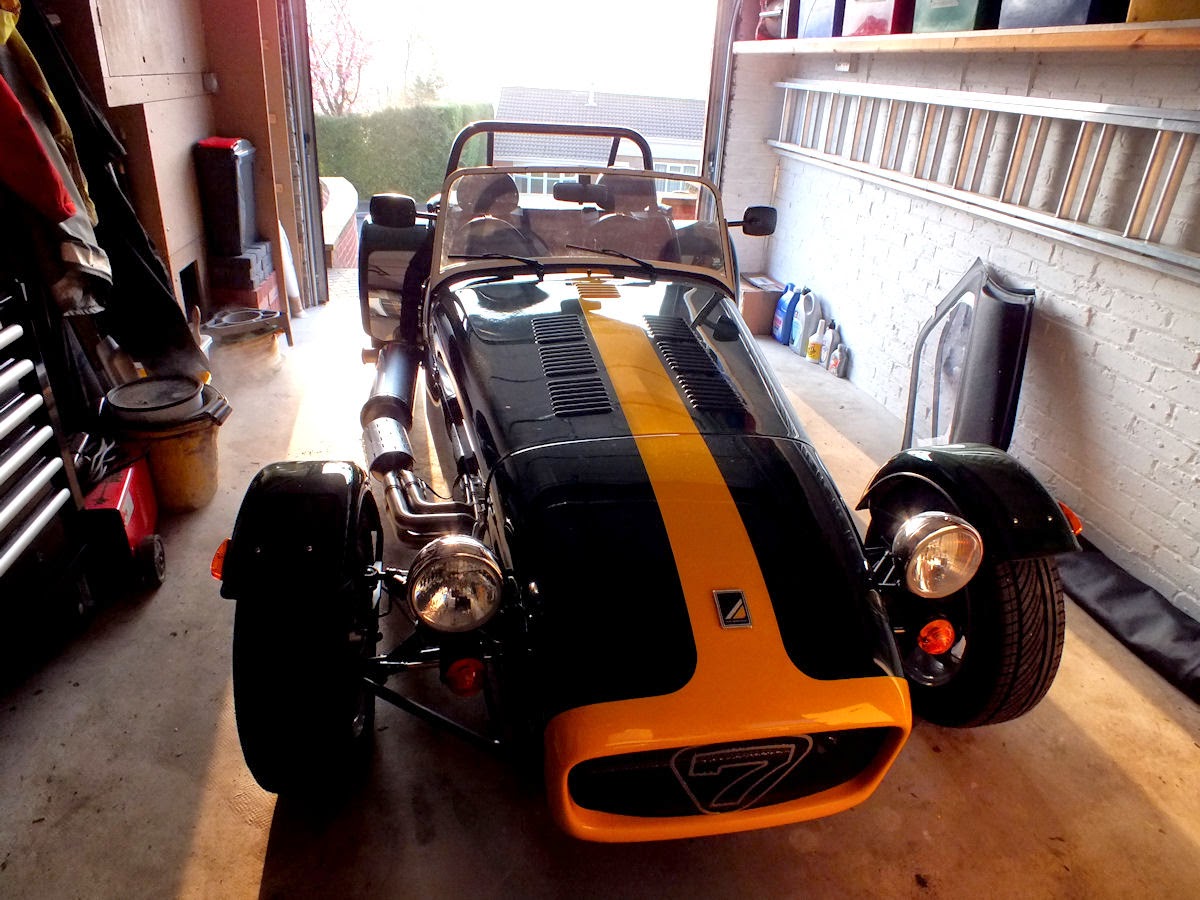
Latest picture of the car.  Just need to charge the car on Tuesday before Wednesdays IVA.

The car being loaded onto the trailer.

Caterham Midlands waiting area.

The steering clamp should look like this.

Mine now looks the same.  Not sure why the chamfer has to be that way but so be it.

I had positioned my exhaust clamp a little bit away from the edge of the silencer but it needs to go at the end of the pipe.

Like this.

For the IVA you need to fill lower wish bone bolt hole.

The cast lug is sharp around the edges so needs filing down.

like so.

I found Caterham had put a new battery cover on, thank you.  I also added in the breather tube. 

I turned the trim around so the soft rubber curled outwards rather than inwards.

The mirror is now in the top window fixing hole.

I added washer pipe to the repeater cable where it passes through the skin.  I also added a nut / bolt cap to the upper wishbone front bolt.

School boy error my seatbelt release points up and it needs to point down.

A quick test drive by the mechanic


The car back on the trailer.


I have three items left to do sometime this week then its the IVA next week.


Thursday 10 April 2014

Day 27 - Paint the Grille

Not a lot happening. PBC next week. Fingers crossed the engine hunting and nose cose damage is sorted. I'm sure it will be. Other events to look forward to are Peter and Pauls (LADS) GTKYS day on Saturday the 12th. Hope they don't point out something obvious I have missed.

 Anyway, I finally decided I would paint the 7 on the new style grille today. I also decided I would paint it silver rather than the obvious yellow. The third dilema was then whether to paint the number 7, frame and 4 point supports or leave the 4 point supports black. Jeeps I must be bored. Anyway, pics below.

The whole grill was masked up before cutting out the number seven and frame with a knife.

3 coats of silver plasticote.

Initially I thought I had managed to only spray the bits I wanted to.

I then found some silver on the black grill so out came the black paint and a fine touch up brush.

The grill resting in place on the car.  I will fit it once I have put the replacement 3M film on the nosecone.

Sunday 6 April 2014

Day 26 - 3M Paint Protection Film, A Frame Shims

I decided to finish the Paint Protection today. I tackled the rear wings first which open your eyes as to how to stretch the film to get the film to sit flat on the double curves. The side film went on easily but then I had a nightmare with the nose film. I also changed the washers on the A frame. When I torqued it up originally, on one side the washers seemed to mis-align themselves and squash out of shape. Anyway, all fine now.

Spacer washers replaced and torqued up without being squashed this time.

Squashed and un-squashed washers.

I found a slight leak on the rear caliper when I was replaceing the a frame washers.

At this point I was wondering if I should have got the man who knows what he is doing to put the film on.

After half an hour the film was on and looked pretty good.  I found with the front wheel arches that the slight marks disappear within a few days.

I placed the template on the car and it seemed to be short of reaching the wheel arch with plenty of spare at the other end.  There are two clear marks to line up the template with so not sure why it is cut this way.

The sides went on very easily due to the panels being straight. 

Then the front.  What a PITA.  What was worse is that as I started to get the film shaped and stretched right, I started to get lots of black dots on the underside of the film.  Not sure if this is the glue drying out or as a result of overworking but ultimately I went back a few hours later and ripped it off.  Seriously not happy with it.  The lower film was fine as were all of the others.  So not sure why all the dirt / dots / black bits.  I will order another piece and ask PPG what it could be.  The nose was cleaned the same way as the other panels.