I finally got around to getting the delivery video and engine start video on line. The only snag is that my official first fire up video failed so what is on show is the second fire up video. I didn't have the engine on for long as a light came on on the dash at which point I shut it down.
I have since the video set the idle to ~1500RPM and topped up the brake fluid as that was the light which came on.
Caterham Delivery
Caterham Engine Start
Monday, 24 February 2014
Sunday, 23 February 2014
Day 20 - Door Catches, Painting
Only a few hours to tinker today, then again there aren't many jobs left to do. Today included :


- Passenger Door
- Door catches
- Underbody paint
I took a picture of the seat installation with the base of the seat removed. This one shows the front fixing.
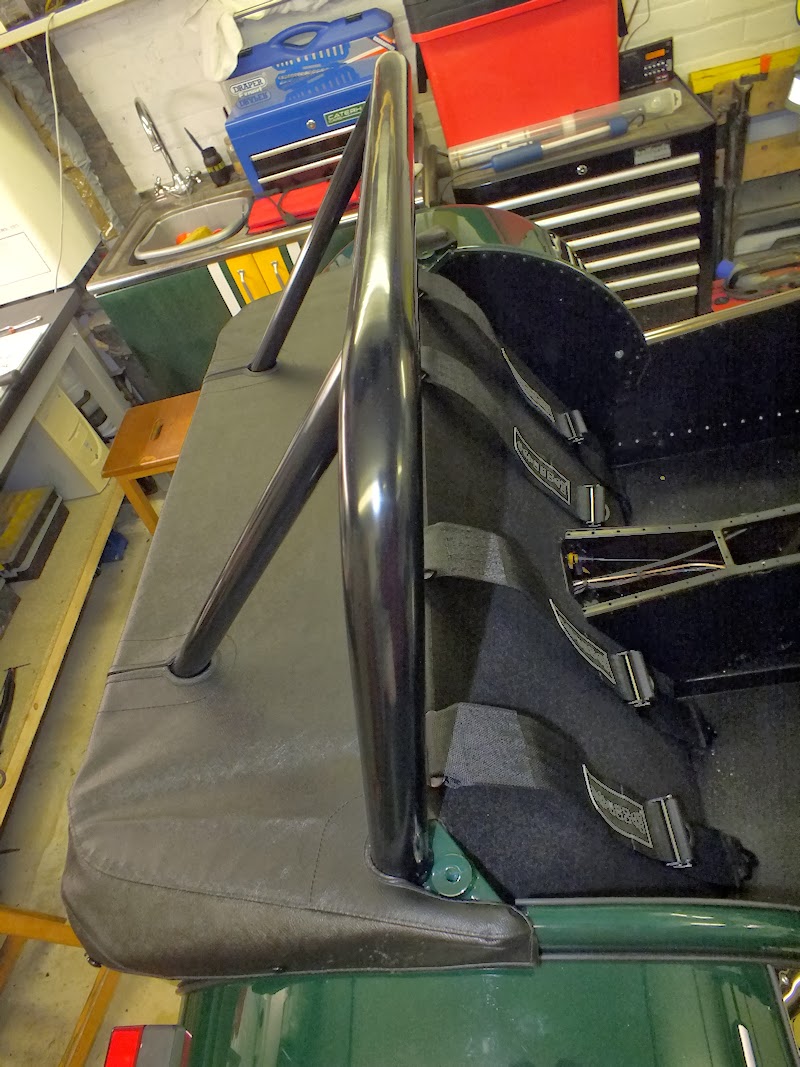
This is a shot down the back of the seat showing the rear fixings.
I found that my rivet gun could not pull the rivets tights as the head would not fit inside the popper bases. So I put some washers over the rivet and this allowed the rivet to sit right at the bottom of the popper base.
I fitted the door catches for the arm rests and very comfy they are too. For the popper for the leather strap, I managed to get the two door poppers at different heights. I suspect I have halved the value of the car with that faux pas
One point to remember is to put the catch behind the rubber trim and inner black cockpit panel.
Close up of catch wrapping over the rubber trim.
The passenger door (side screen) was fitted.
Saturday, 22 February 2014
Day 19 - Hood, Door, Seat Belt, Seats, Floor Mats
Managed to grab an hour before taking the kids to football this morning, then managed to grab a few hours after the rugby. So all in all a good day. I tackled the following jobs....


- Inside seat belt bolt - The 7/16 UNF 1.25 pitch bolt just did not want to go in. So I headed off to halfords to get a tap as the problem seemed to be the powder coating. Infact there was so much powder coating inside the thread I am surprised there was any on the chassis. I have been lucky up to now and not had a problem.
- Once the final seat belt element was in I put the seats in. I found this quite easy despite others saying it was a pain. I did find the bottom of the seat lifted out which made getting to the bolts very easy so I don't know if that is why it was easier.
- The roof went on and I fixed the final 2 poppers.
- The drivers door went on.
- The caterham rubber mats went in.
Ahh, the wife holding the allen key for the seats while I take pictures and tighten the bolts underneath.
Whoop, the two of us actually fit in the car. Feel like I need some name stickers for the top of the window.
Seat and seatbelts done.
Mats done. Just the three poppers by the seat or should there be more poppers up the other end of the footwell?
The roof arrived last week so I clipped it on. It left me with one popper base to drill and fix to the car and one popper to put into the hood before drilling a base into the car.
The roof is, well, its a canvas roof, it does what it does.
Now the door was a pain, hence I have only done one of them tonight. Surely caterham could make a template and drill the doors. To hold the door up, hold the handles on the inside and check it has slid nicely into the roof, then mark the hinge holes is a pain. I did one hinge at a time.
Some close ups to show how the door sits on my car. Hopefully this is correct.
This curve and setting out seemed right.
The door frame starts to wander out of line slightly as it goes to the back, but if I get the top line right then the top hinge would not have been in the metal. ???
The top corner looks in to deep but does it really matter ?
This bit seems a good line. Just need to fix the door catch and poppers tomorrow.
I am currently just looking at all the IVA forms. Does anyone know if you have to do the seatbelt conformity form? IVA 19b ?
Friday, 21 February 2014
Day 18 - LADS, Brakes, Clutch & Hubs
Day 18 is in two parts really. On Thursday night the car had a treat. Two real mechanics had a good look around it and tinkered with the brakes and the clutch. I can't believe how much air came out of the rear brake again. That's 4 eezibleeds and 2 manual bleeds the brakes have had. They also showed me how little grease was used in the front hubs and how to sort it out. Thanks to Paul and Peter from LADS.
Day 18 Part Deux and the car was back to having me flapping around.


Day 18 Part Deux and the car was back to having me flapping around.
The central console metal place was riveted into place.
The handbrake was loosened as much as possible and held vertically while the center console glided smoothly onto the gear stick and handbrake !!! The car is starting to look very smart with the carpet, trim and center console.
Thanks to the LADS again, I purchased some 19mm and 10mm rubber coated p-clips to fix the handbrake cable to the chasis. IVA does not allow the use of tie wraps anymore.
It took some doing to make sure the handbrake cable did not rub on the drive shaft.
Having been shown the way by the LADS, I decided to sort out the passenger side front hub. So first things first remove the caliper.
Remove the split pin and the nut.
Remove the hub and viola, barely any grease.
And inside the hub, again barely any grease.
So the bearing and shaft were well greased.
Inside the hub got some grease
And it all went back together. I just now need 2 new split pins.
Saturday, 15 February 2014
Day 17 - Engine & Carpets
The 20L jerry can arrived during the week so I headed to the local garage to get £28.15p worth (!) of fuel. Things didn't start well. The jerry can bendy nozzle, well, just bent off. It was probably too cold and the plastic snapped. So the hunt began for a clean funnel which would work with the Caterham filler.
So the process was something along the lines of.


So the process was something along the lines of.
- Put 20L of fuel in. I was told it had to be more than 15L
- Disconnect the Inertia switch
- Run the engine (starter moter), for ~30 seconds.
- Watch that the oil pressure comes up. Mine hit 4 bar.
- Connect the inertia switch and press the button.
- Turn off then on again and press and hold the start button.
- After no more than 5 seconds the engine came to life.
- The idle seemed to be about 2500-2700 and was hunting.
- I watched the oil pressure go up to 6 bar when it was cold.
- I also watched the exhaust primaries burn off some protection which was worrying at first.
- I left the engine running to warm up to coolant and oil.
- The oil pressure dropped to 2 bar when it was warmed up.
- Revving the car took the oil pressure up to 4 bar and 6 bar.
- At 90 degrees C the fan kicked in and the temp dropped to ~80-85 degrees.
- The aluminium radiator did the same thing as the exhaust primaries and burnt off some protection.
- Whilst the engine was running a red light on the dash came on. I thought it was the engine but it turns out to be the brake fluid level and so I need to top that up.
- I tried to put the car in gear but it wouldn't go so I think I have to mess with the clutch bleeding again.
Great feeling to be fired up and pumping out some serious fumes in the garage.
I wasn't amused when I heard a nut fall off the engine whilst I was running it up to temperature. Can't believe it just fell off the alternator.
Nicely warmed up primaries.
Another exhaust shot.
The car was ticking over at ~2500 RPM. I adjusted the screw under the throttle level and set it to idle at 1500. It seemed to cut out if I set it any lower than that.
Only the one leak identified so far. I was loosing some coolant from the temperature sensor t piece. It was the sensor itself that was leaking. I have not sorted it yet. (It was too hot to touch).
Seat belt harness went on. I put some grease on the spacer and leather so the two items slide nicely on one another. I found as I was torquing up the harness that the spacer would twist and therefore twist the leather boot cover.
I put the poppers on for the boot cover. I placed a fan heater in the boot for a while to warm the leather up. Smacking the dot tool was a silly process. Can't help but feel a ratchet type tool would be better. I placed the dot tool on the cross beam by the seat belts to do the whacking.
Boot cover, seatbelts and some carpet in place in the cockpit.
Boot carpet done. I find the boot surprisingly spacious.
Sunday, 9 February 2014
Day 16 - Wheel Arch, Carpet & Mirrors
The rugby training was cancelled due to the weather so an unexpected morning on the car. Managed to tackle the following :


- Drivers side rear wing,
- IVA Mirrors,
- Roll Bar,
- Hood Brackets,
- Back Panel Carpet,
- Bleed Brakes,
The rubber trim was held on with pvc tape. Three 'V' cuts in each corner to create the smooth curve.
The passenger side trim from yesterday.
The joint between the wing trim and protector trim.
The butchered fibreglass to allow the rotary arm to fit. I was surprised how much needed cutting to get the other holes to line up. The drivers side needed a lot less cutting.
This is the metal trim in the boot cover being removed as I have the 4 point harness. I just glued the edge trim back together. Couldn't find the needle and cotton in the caterham part bags so use glue :)
I glued the carpet on with ever stick 2 spray adhesive. It seems very very tacky. Bit of a stringy mess so you have to cover anything you don't want gluing but allows you to remove for a second go.
My wife came down after lunch as asked if I needed anything so thank to confirmation from Peter (LADS) that my brakes were spongy, we set about bleeding them again but this time the old fashioned way. We got lots of air bubbles out which surprised me as the eezibleed kit was finished getting air bubbles out after going to each wheel 4 times.
Saturday, 8 February 2014
Day 15b - Rear Wheel Arch
Decided to go back to the garage after the rugby to do a bit more work on the car. Peter (LADS) came around to help out with the rear hub nut and also sample my soft brake pedal. So with Peter confirming the 41mm nut is ok just a bit big for a 41mm socket I set about filing the edges down. So jobs complete include :


- File down 41mm socket and tourque to 270Nm
- Put the scuttle trim on.
- Put the rear passenger side wheel arch on.
- Put the rear passenger side back light on.
Once I had filed the nut down (it only needed a little bit of filing). Thanks for the help Peter, I had visions of having used the wrong nut and cross threading my drive shaft. Hitting 270Nm wasn't as hard as I thought it was going to be. The handbrake held the wheel locked to allow me to torque up the nuts.
What a time consuming job. As others had done I taped the rubber to the back of the chrome wing protector, the corners required 3 'V' cuts each to create a nice curve. I then held up the plate to the wheel arch and drilled the lower left hole and rivetted it. I simply then worked out from there up to the top right rivet. Stupidly I kept forgetting to remove the protection as I riveted, so about four rivets have plastic under them.
The sill protector went on earlier to day and it all looks very shiny at the moment. Annoyingly (or not) there were a couple of marks on the shiny plates where the plastic had been hit and scuffed somehow. On the other hand they are going to get peppered with stones so does it really matter.
I found I didn't have to cut 'V's in the wheel arch trim. I warmed up the trim with the heater so it was pliable and it made a nice curve from one fixing point to the next. It was when doing the bolts up that I regretted being so fee with the dinitrol around the fuel tank.
I used a line of impact adhesive to keep the scuttle trim on. It's a tight fit anyway but I thought if the IVA boys are going to tug away at it then I should glue it on.
Finished the days build by putting the back light on. It's look wonky in the wide angle shot but I assure you that I am hopeful that it is level when the car sits on its wheels.
Day 15a - Trim
Finally managed to get some time to work on the car. I had a list of fidly bits and pieces to do:


- Drill and fit 20mm elbow into breather bottle.
- Fit wiper blades.
- Put trim on the back lights.
- Put knee trim panels in.
- Tighten the rear wheel hubs.
- Paint the rear wheel arches (inside).
- Fit water pipe saddle.
- Rivet internal panels.
20mm hole drilled in the breather bottle with the elbow and straight connecting pipe joining the two. I decided to route the pipe this way as a smooth curve put the pipe too close to the belt and tensioner.
This is a 19mm saddle. Seems to small to me. I am waiting on Derek getting back to me.
Two coats of yaught varnish on both sides should give the wood a bit of an extended life.
Working wipers, whoop.
This is the lowest position I could set the wipers.
I sliced the long side of trim off and glued what was left to the rear lights.
Super glue didn't seem to take to the black plastic so I ended up using impact adhesive on both the plastic and trim.
I added the knee trims to both sides but found the holes didn't line up with the ones in the side panels. I then set about blunting all my drill bits by drilling the stainless steel trim.
Subscribe to:
Posts (Atom)